Can't find what you're looking for?
Ask us a question and we'll get back to you soon.
Basics
- Create an account in Domino CRM constructor using your Telegram account or email;
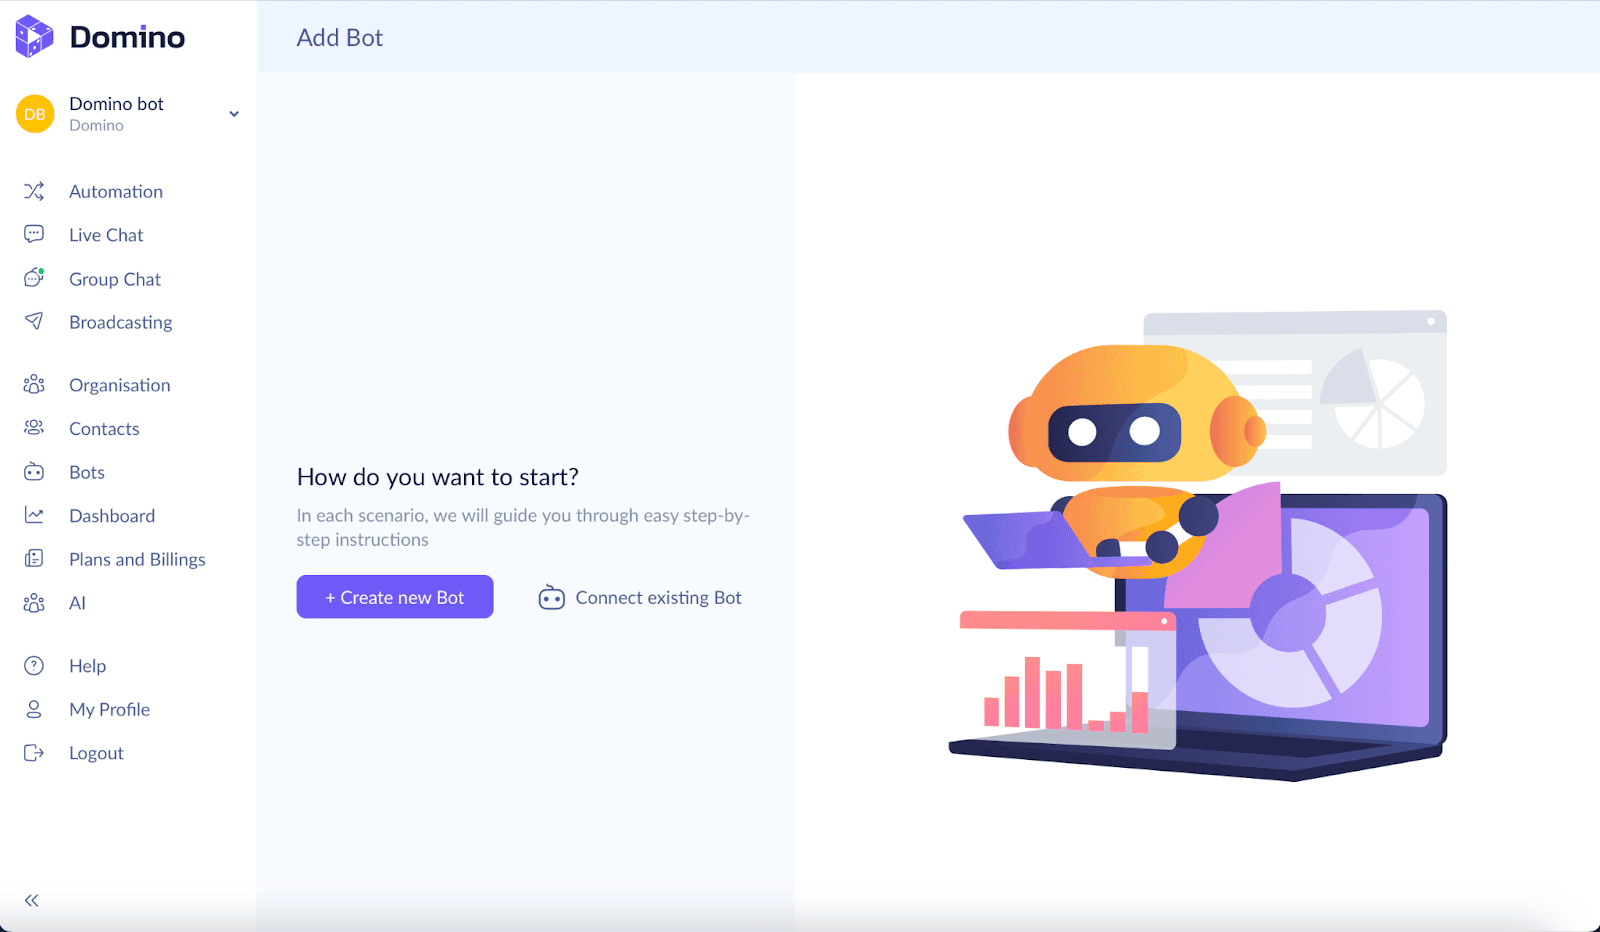
- You will see two buttons to choose from, "Create new bot" or "Connect existing bot." Click on "Create new bot";
- Open Telegram. In the contact search bar, type @BotFather; In the chat with @BotFather, type the command /start;
- @BotFather will show you a list of commands. In response, type /newbot;
- Give your bot a bot name (this will be displayed in your bot’s information);
- Then, @BotFather will ask you to give the bot a username (what will be displayed after the @ symbol). The username must end with "bot." Your first choices might be taken, so keep trying until you find an available one;
- Once you find an available option, @BotFather will provide you with a token (a combination of numbers and letters highlighted in red);
- Copy the token and return to your Domino CRM account;
- Paste the token into the “Telegram bot token” field;
- Click “Connect”;
- Start working on the flow.
- Go to the chat with @BotFather;
- Type /mybots;
- @BotFather will show a list of bots you have created. Click on the one you want to connect;
- @BotFather will show several action buttons. Select “API Token.” @BotFather will display a red combination of letters and numbers. Copy it;
- Return to your Domino CRM account;
- Paste the token into the “Telegram bot token” field;
The bot is connected and ready to use!
Flows
- In the left column, at the very top, there is the “Automation” section;
- While in that section, find the “New flow” button;
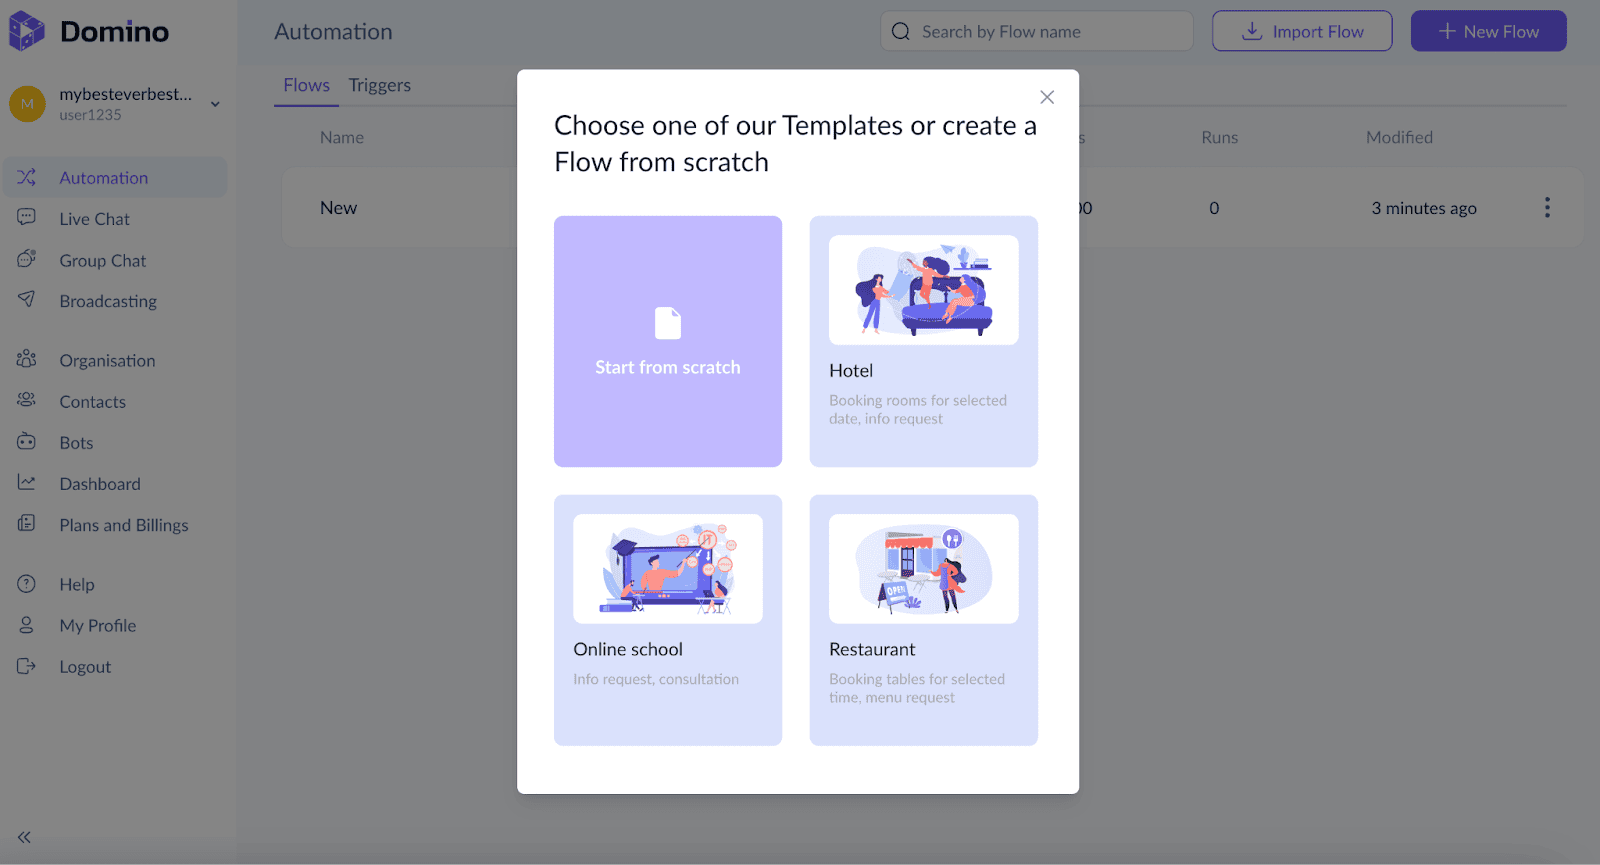
- After clicking on it, Domino CRM will offer either a standard template for a specific industry or the option to “Start from scratch”;
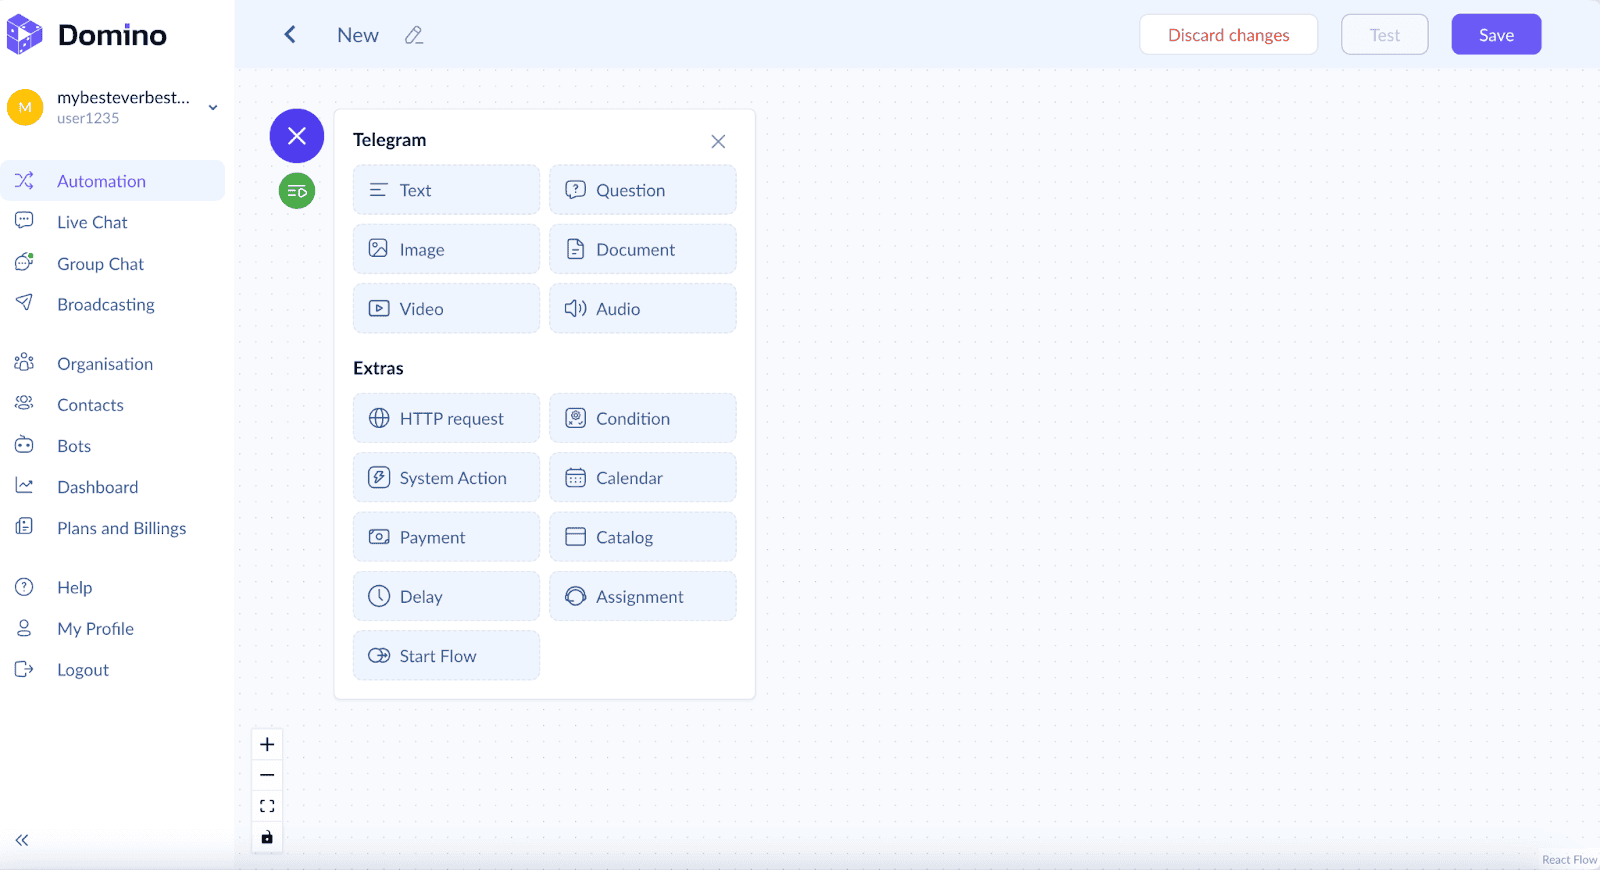
- Suppose you chose a custom flow. A workspace will open where you can arrange and connect nodes using your mouse or touchpad;
- If any node isn’t fully configured, Domino CRM will not allow you to save the flow;
- The problematic node will be highlighted in red. You will see a hint about what still needs to be completed;
- Once all the nodes are properly configured, the flow can be saved;
Test the flow by finding your bot using its @username (as you named it) and starting the interaction;
- In the left column, at the very top, there is the “Automation” section;
- While in that section, find the “New flow” button;
- After clicking on it, Domino CRM will offer either a standard template for a specific industry or the option to create your “Start from scratch”;
- All flows are flexible. It is expected that the client will write the content for the text nodes, provide links to images, add the payment system token, etc.;
<>You can also add new nodes or delete existing ones as needed.
- For this, the flow for the Telegram chatbot must be saved and available for upload in JSON format;
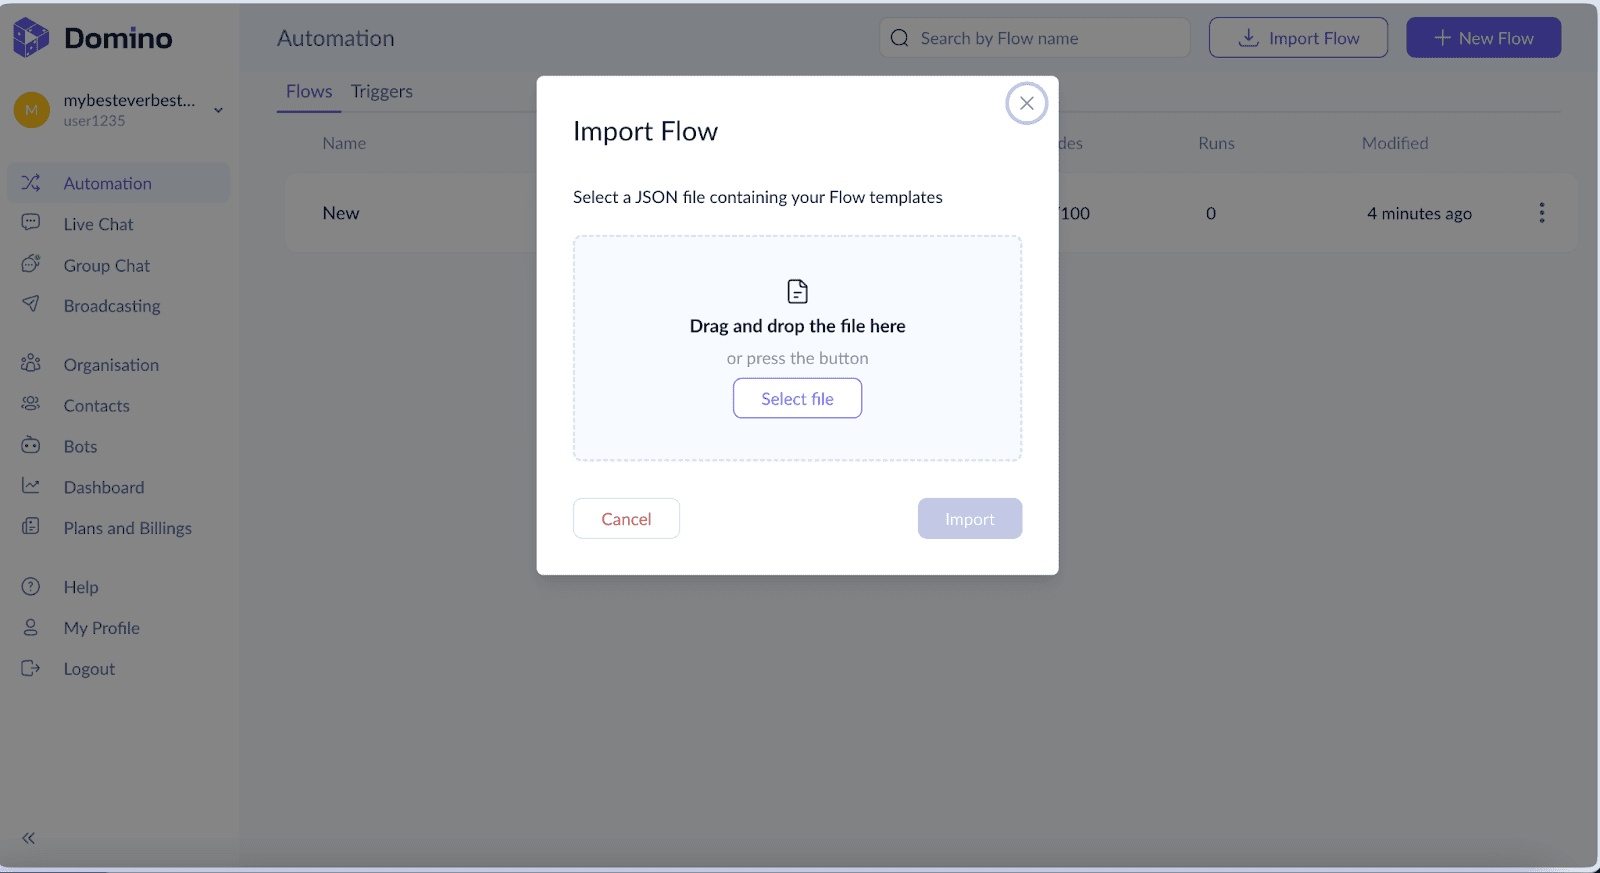
- In the “Automation” section, find the “Import flow” button;
- Drag the file or click the “Select file” button.
Nodes
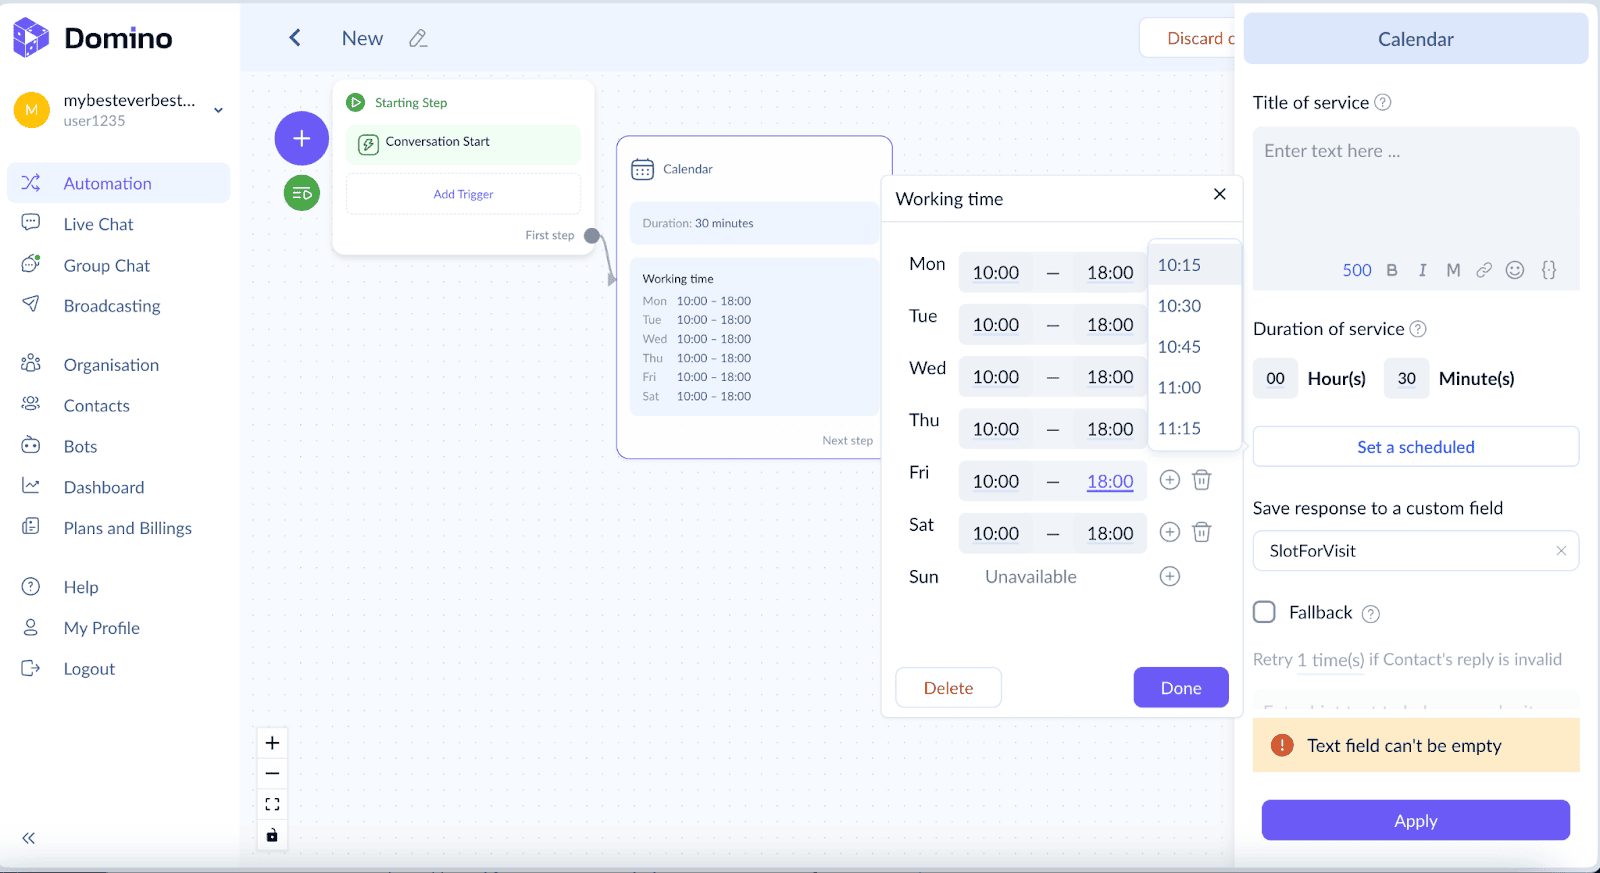
- Select the Calendar node;
- Enter the name of the service to let the client know what they are booking;
- Specify the duration of the service;
- Then set the schedule. You can add or remove working days and split the workdays into available and unavailable periods;
- Assign a variable to save the response. In the “Save response to a custom field” line, enter the variable, for example, SlotForVisit;
- Click “Apply.”
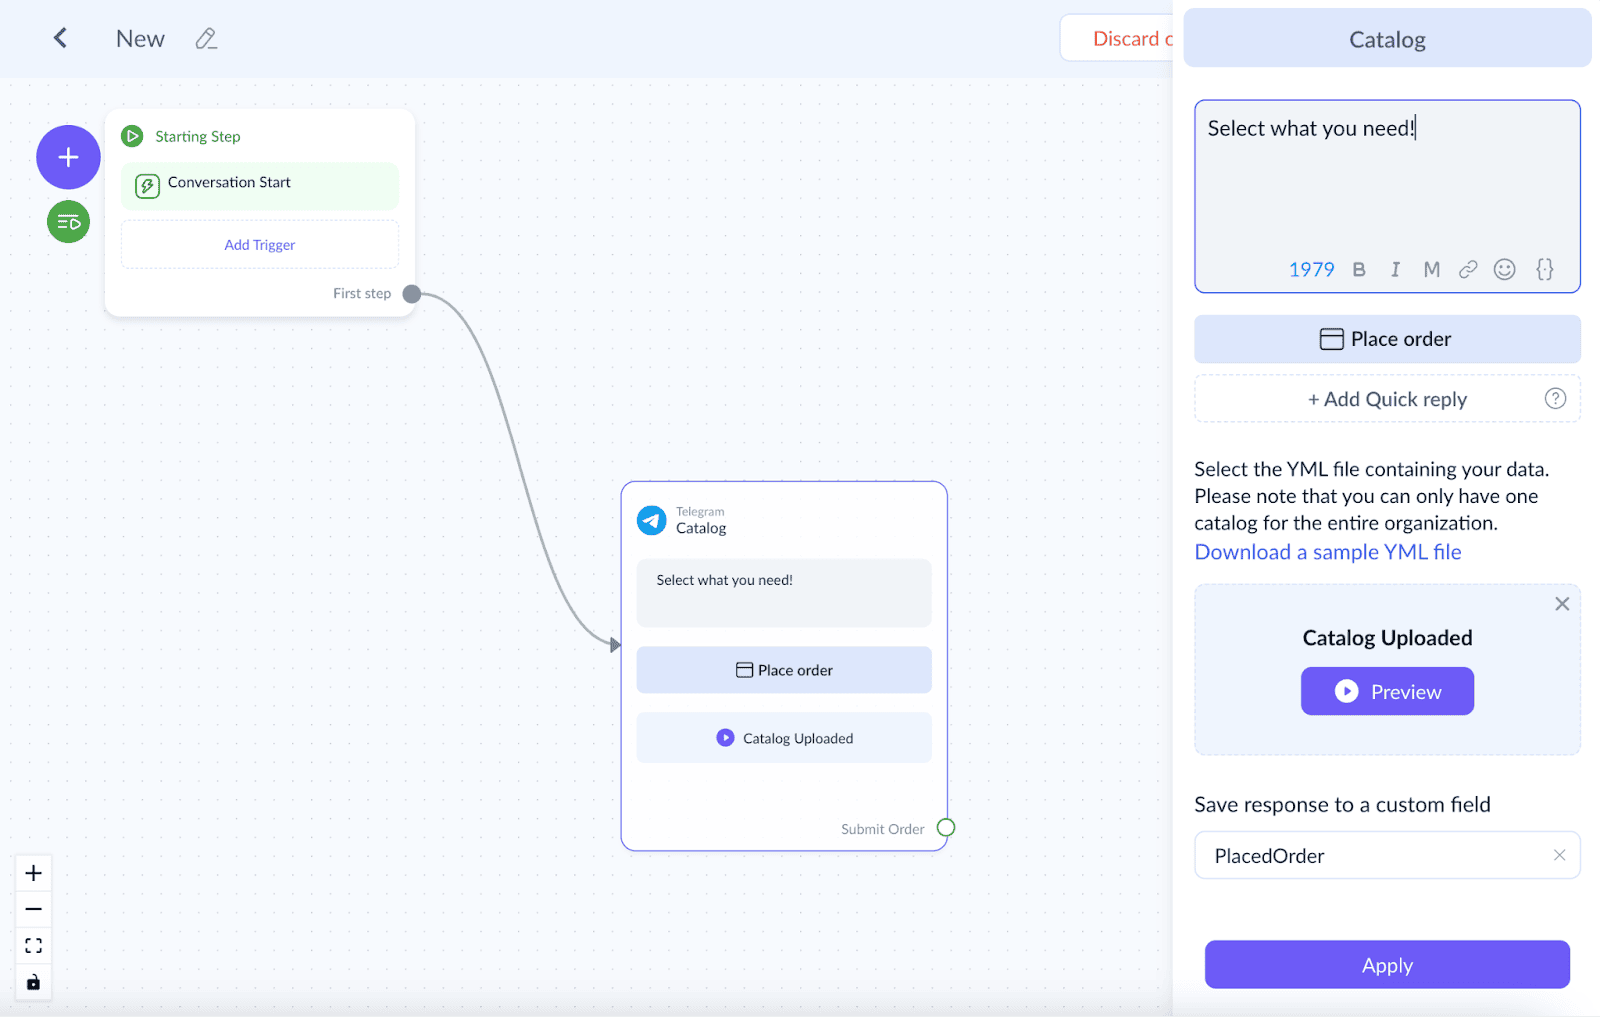
- Select the Catalog node;
- In the service description, specify what is being offered for purchase;
- Assign a name to the order button;
- Now you need to upload the catalog in YAML format. If you don’t have it, you can download a template directly within the Catalog node and fill it with your products and services (using Notepad or Notepad++);
- In “Save response to a custom field”, assign a variable name. The placed order will be saved in this variable;
- After that, you can add the Payment node.
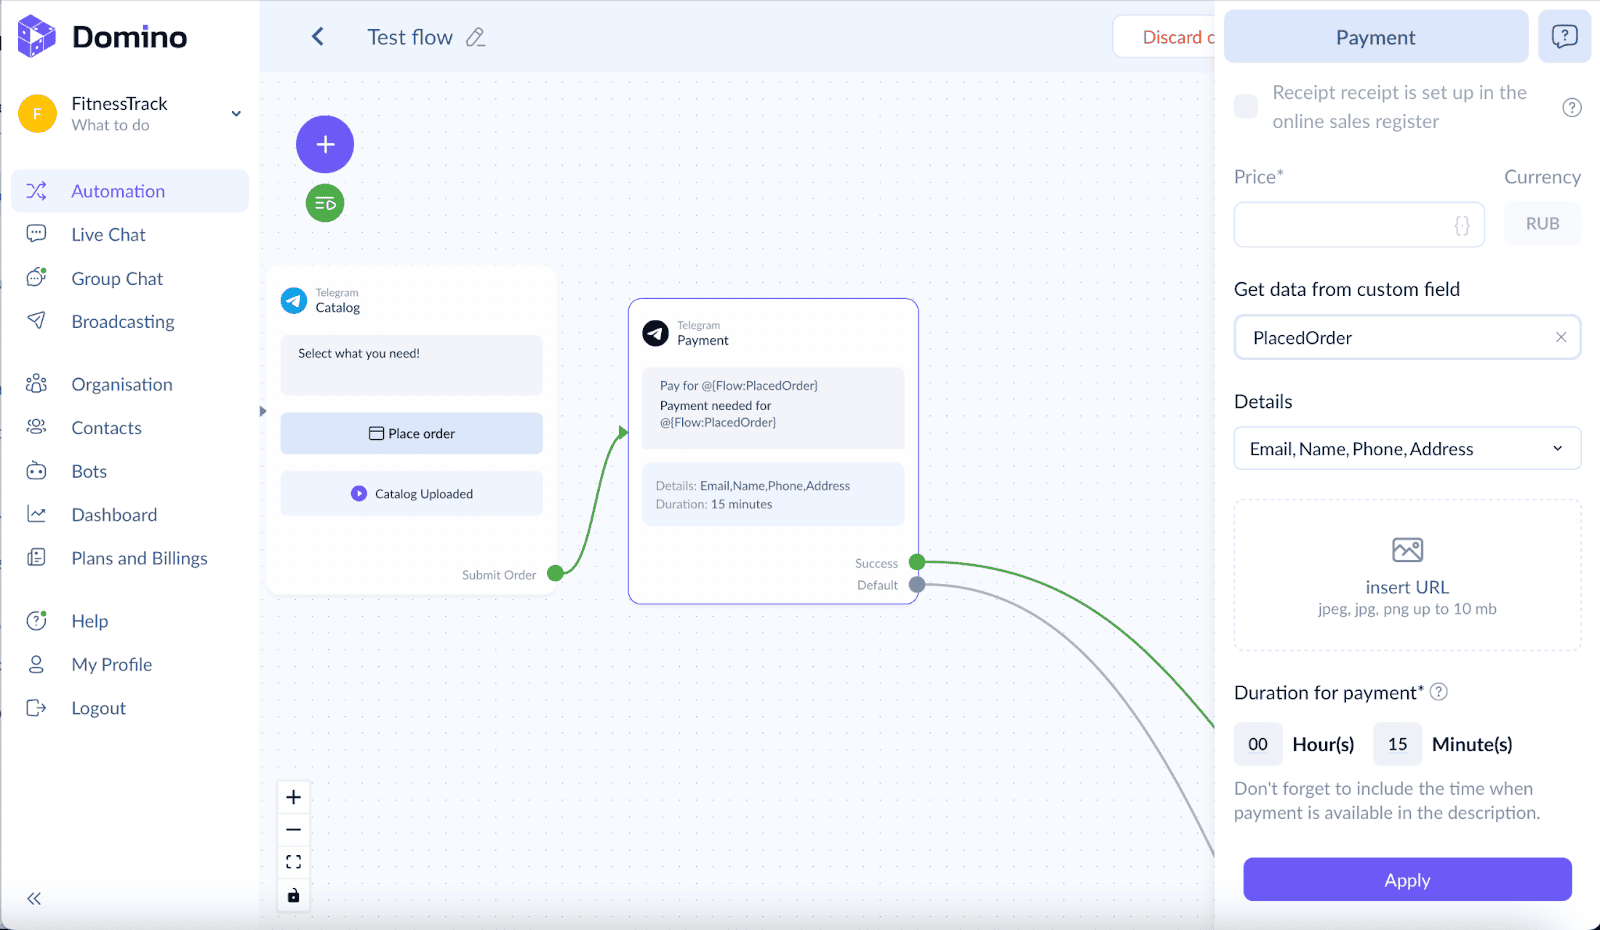
- Use the variable from the Catalog node. For example, if the placed order is saved under the variable “PlacedOrder”;
- Place the Payment node next to the Catalog node;
- In the description, reference the variable using brackets, like this: Pay for your order @{Flow:PlacedOrder};
- In the “Get data from custom field” field, also enter PlacedOrder;
- Set the time allowed for payment, for example, 15 minutes;
- Request any necessary information from the buyer.
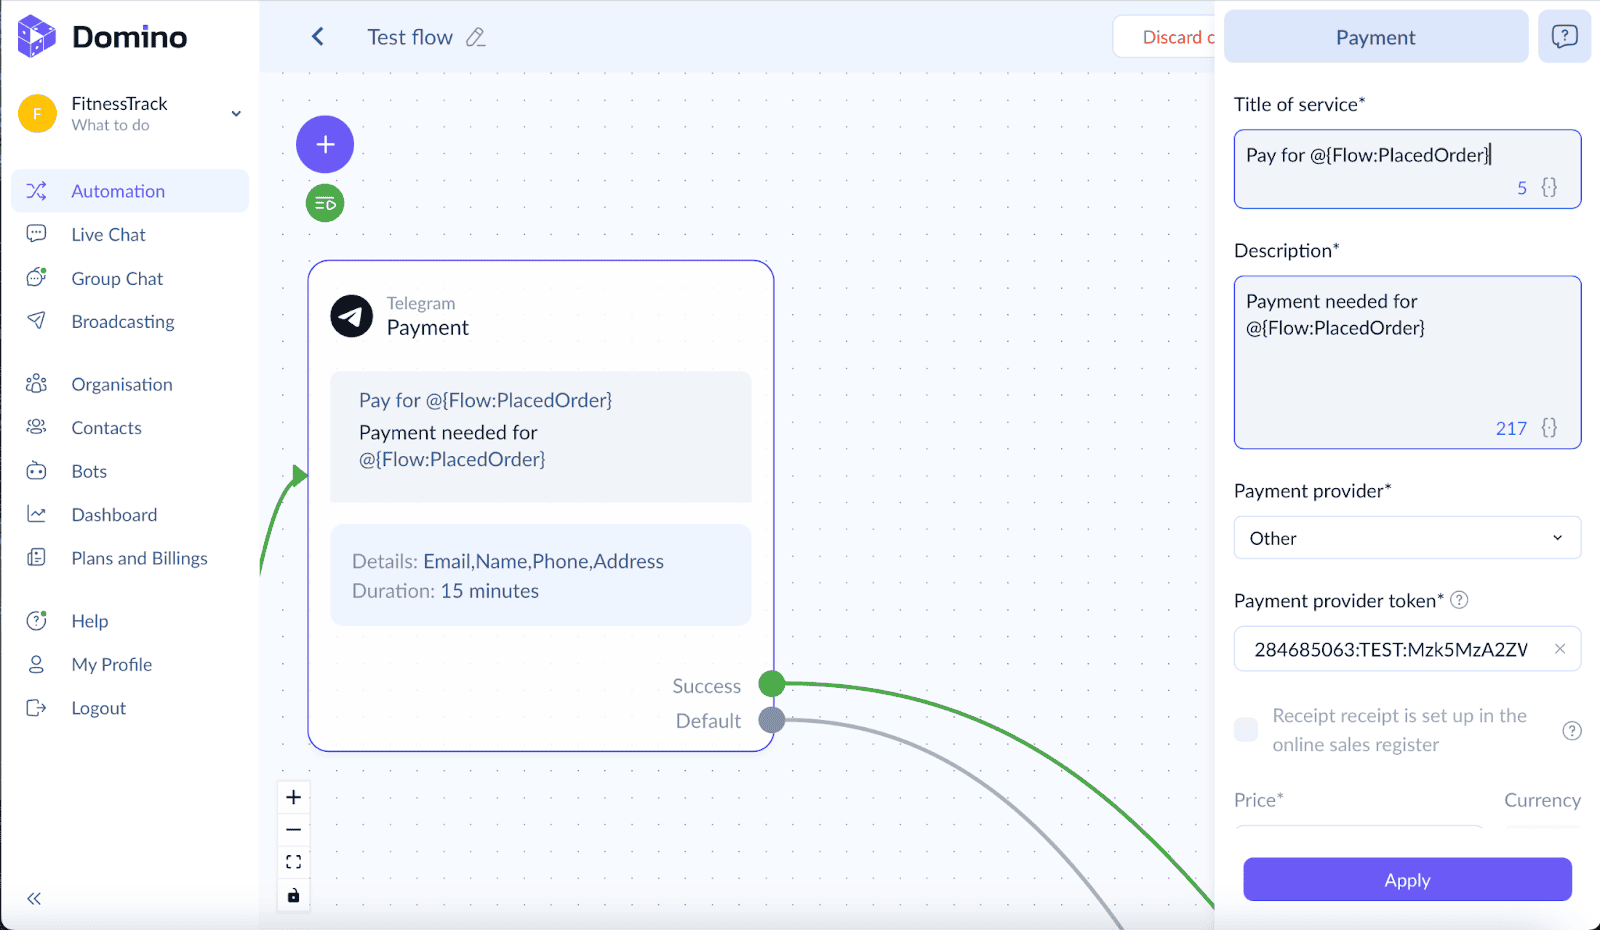
- Setting up the Payment node requires a payment system to accept payments in Telegram;
- Go to the chat with @BotFather and type /mybots;
- Then select Payments;
- @BotFather will offer several payment system options;
- Click on the suitable option and follow the instructions of the chosen payment system bot;
- First, conduct a test integration, then connect to the “real” payment system;
- If you already have a payment system connected, simply go to @BotFather, type /mybots, then payments. It will immediately show you available tokens from activated payment systems;
- Return to your Domino CRM account;
- Specify the payment system and token;
- Click “Apply.”
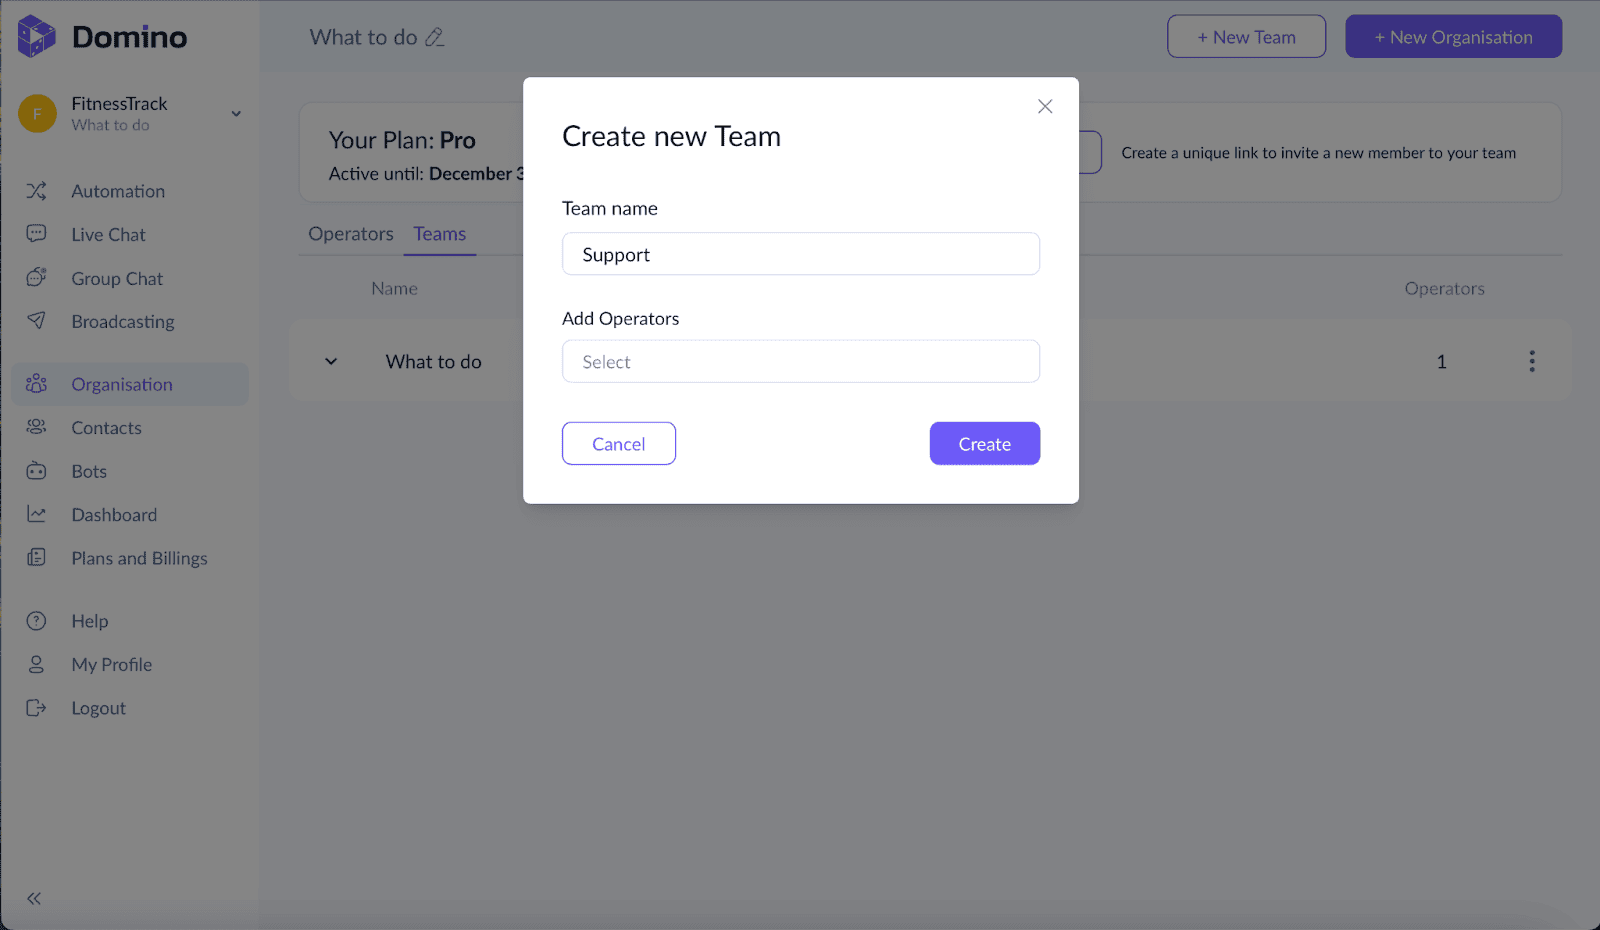
- To enable transferring a conversation with a contact to your team members, go to the “Organisation” section, then click “New team” in the upper right corner;
- Name the team and add managers.
- To do this, you need to be the account owner:
- Go to the “Organisation” section;
- Select the “Operators” subsection;
- Generate an invitation link for the manager there;
- Send this link to the manager’s Telegram contact;
- They will join the team once they accept the invitation;
- After this, you can assign them to handle communications;
- When the Assignment node is triggered, the manager or all team members will receive a notification.
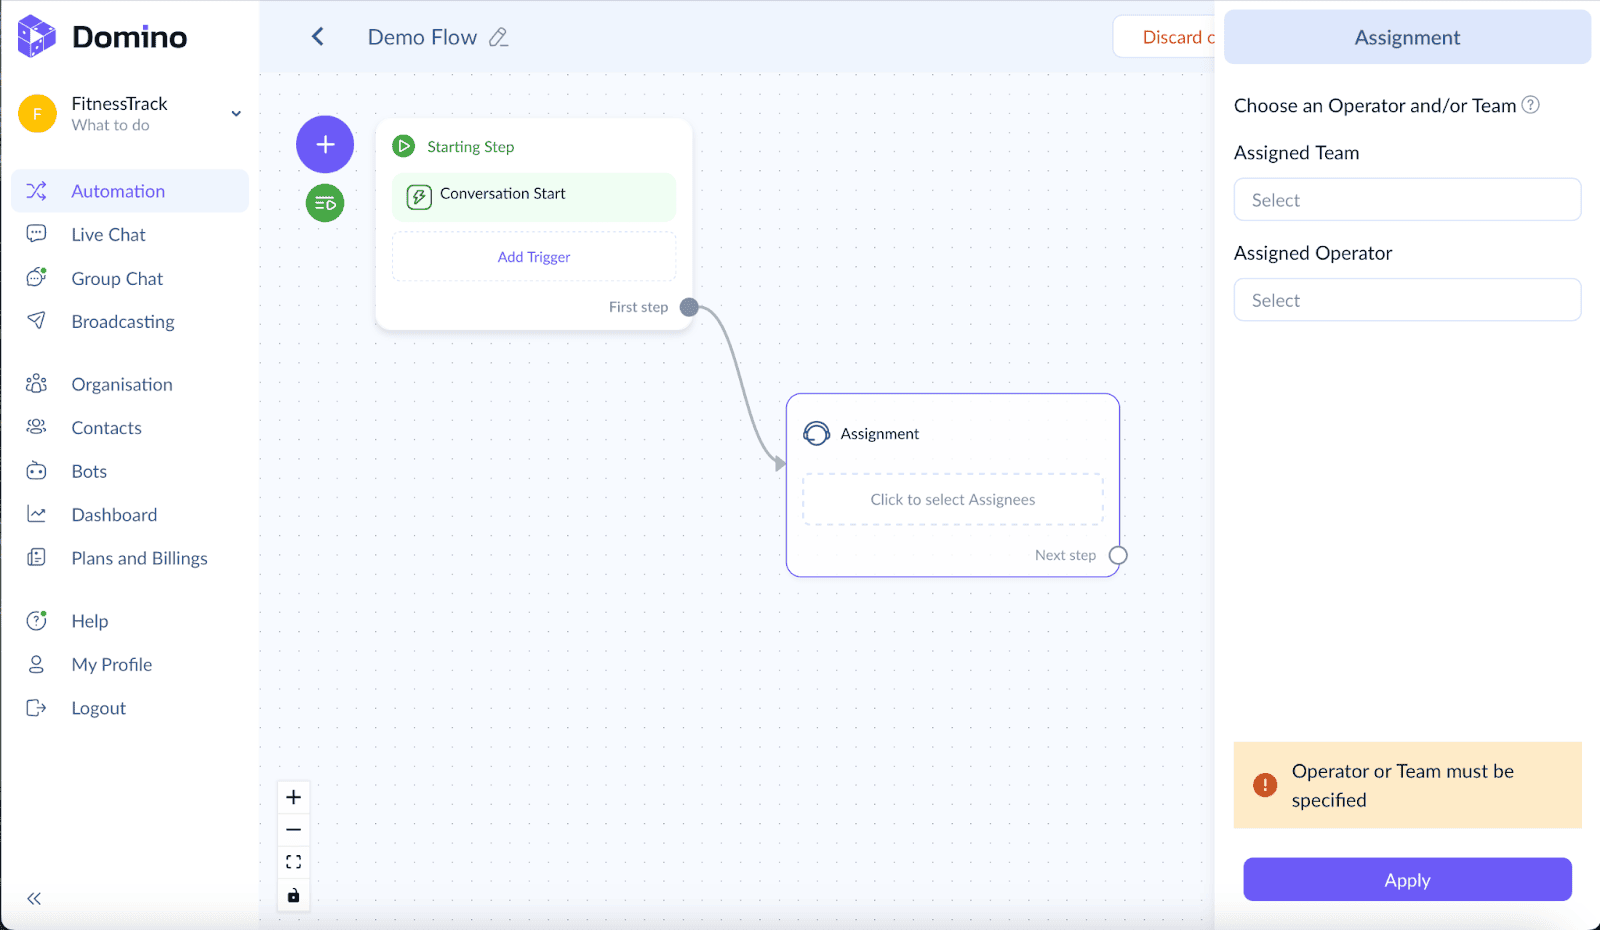
- Place the Assignment node;
- Select the team;
- Specify the operator, i.e., manager.
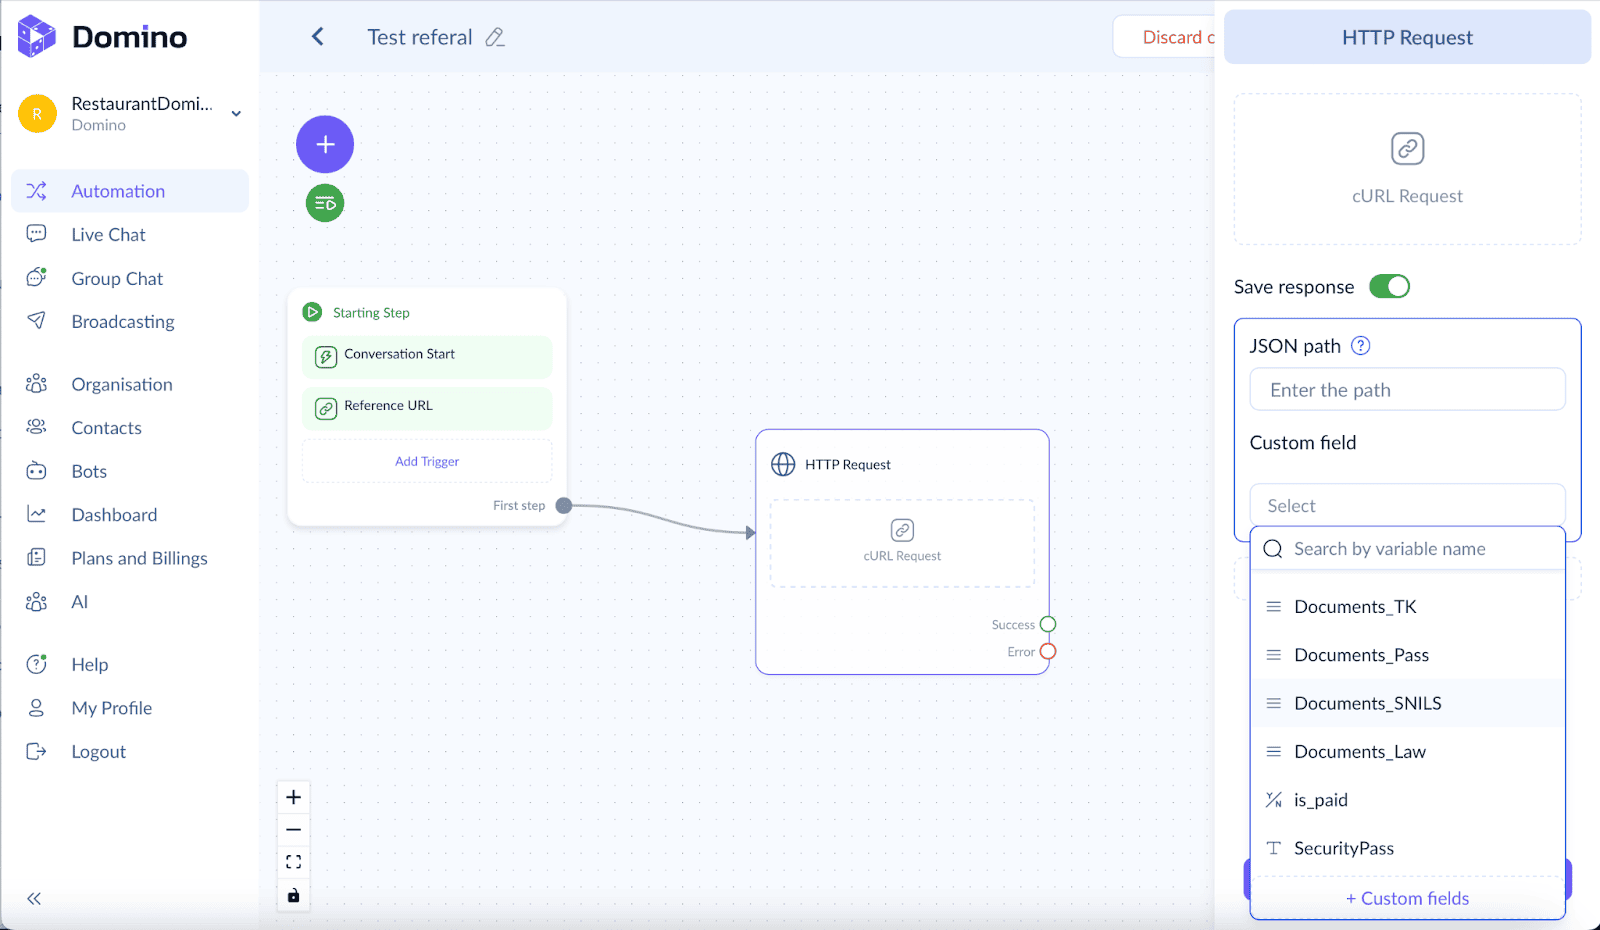
- Place the “HTTP Request” node;
- Insert the URL of the target action;
- Optionally, specify a path for saving the result in a JSON file;
- If left empty, the result will be stored in the custom field variable you specify.
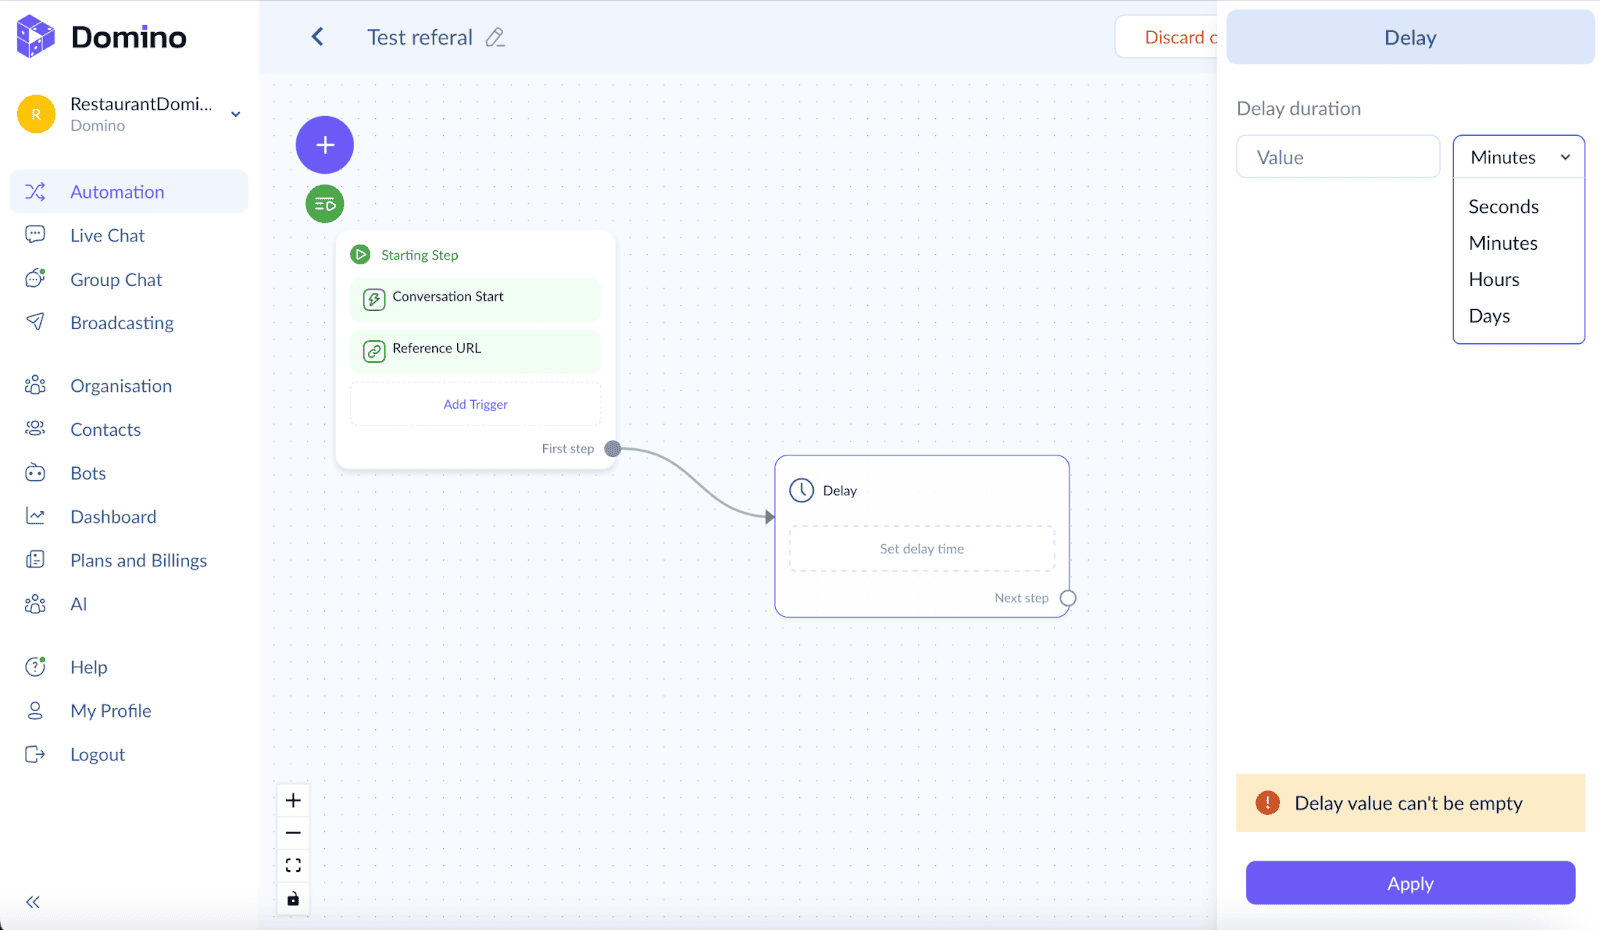
As the name suggests, a delay is needed to allow time for gathering information or completing an action for the client. Domino CRM enables setting a delay from seconds to days.
Troubleshooting
A flow may not start for the following reasons:
- You didn’t save the flow before exiting the editor;
- Certain nodes might be incorrectly configured (when attempting to save, problematic nodes will be highlighted, and a prompt will show what needs to be fixed);
- Multiple triggers can be set, and their order does not matter—the flow will start regardless. However, if the starting node has only a single “Conversation start” trigger, which was activated during the first interaction with a new contact, the flow won’t start a second time. This trigger activates only once and does not restart the flow upon repeated contact. To restart the flow, type /restart or add another command along with “Conversation start.”
Communication
Contacts:
- A contact is any user who has initiated a conversation with the bot. Basic information about them will be saved automatically;
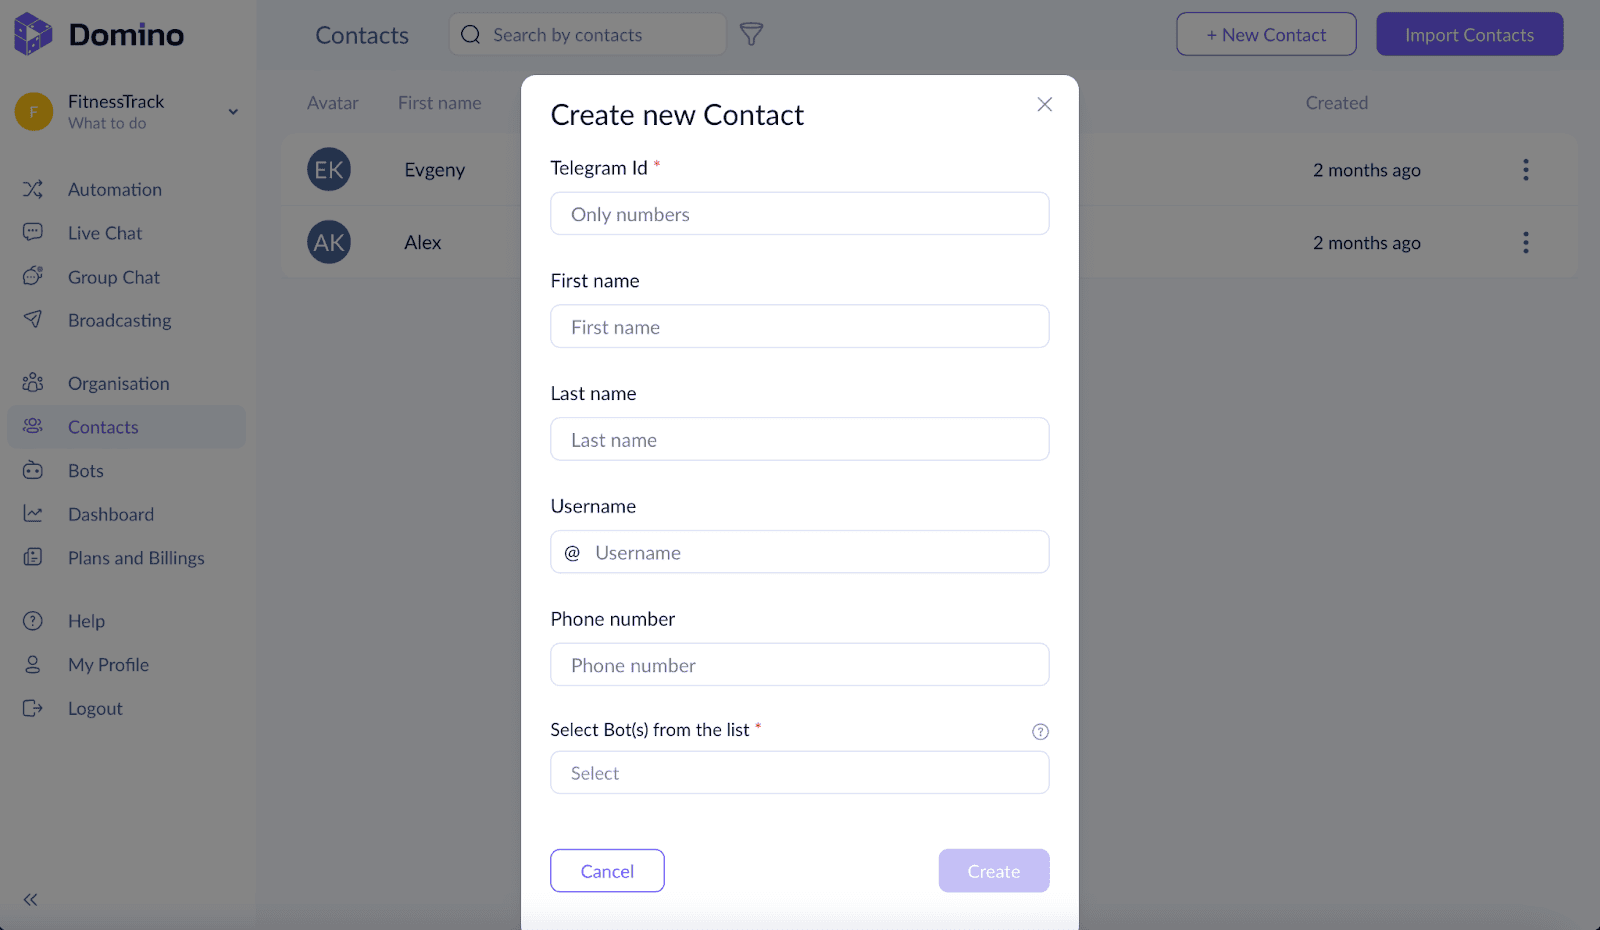
- Additionally, you can manually add individual contacts. To do this, go to the “Contacts” section and find the “New contact” button in the upper right corner;
- Contacts can also be imported in bulk. To do this, click the “Import contacts” button, download the CSV template, add contacts to it, and upload the database.
Chats:
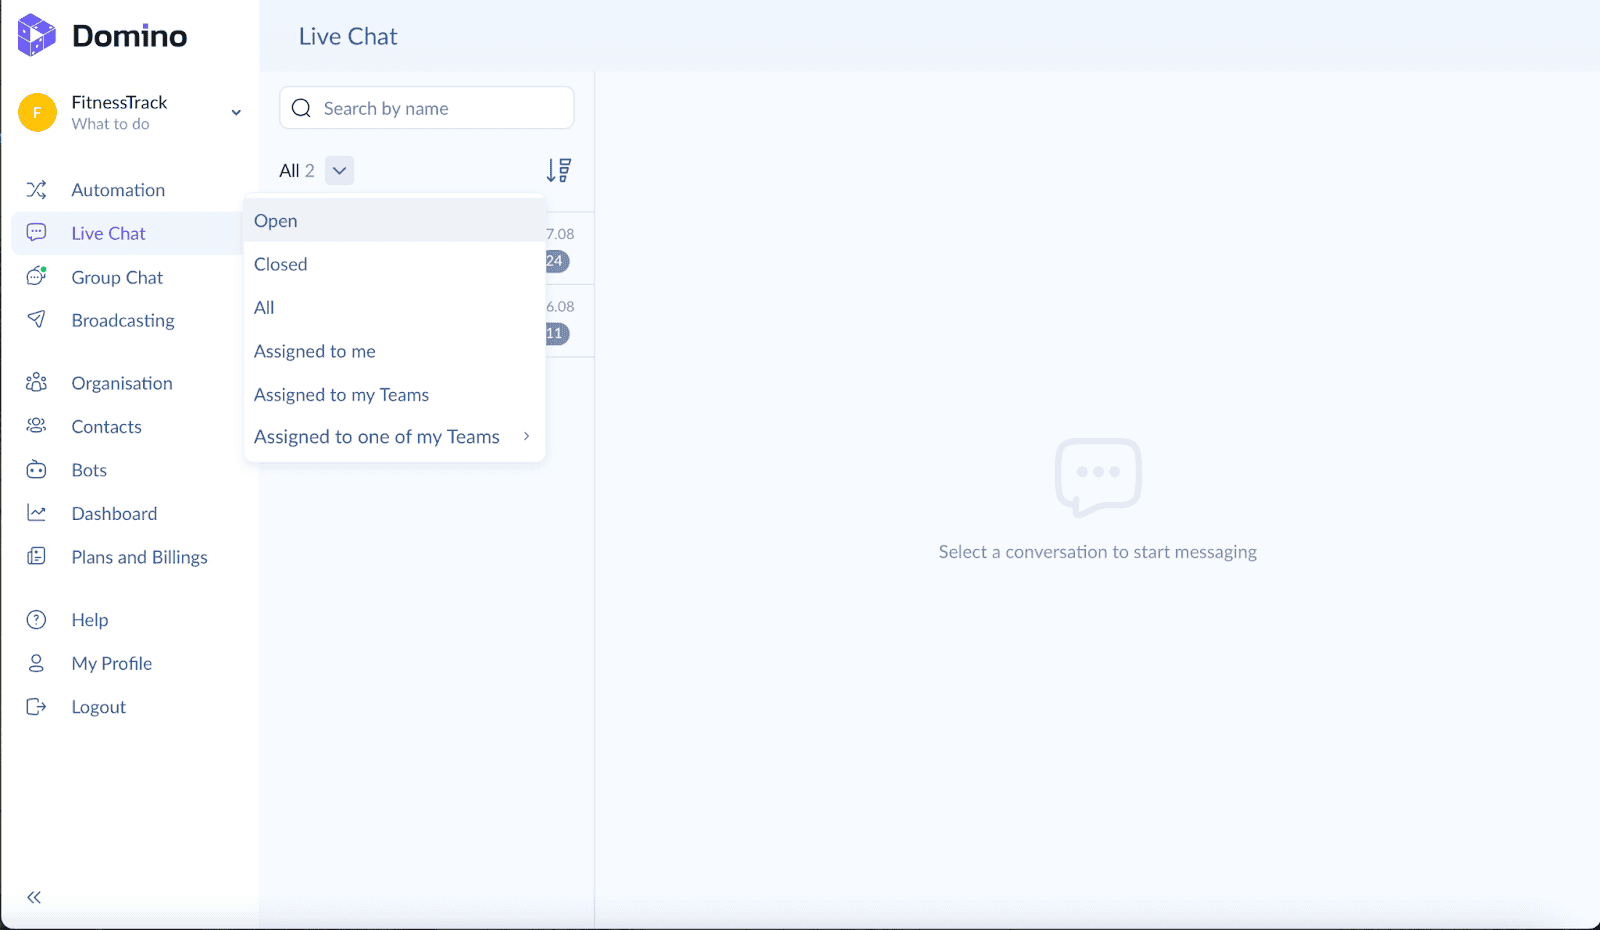
A chat is a complete record of all interactions between a contact and the bot. Chats are available in the “Live Chat” section.
You can filter chats using a simple filter, from oldest to newest and vice versa, or by using more advanced criteria, accessible by clicking the left arrow.
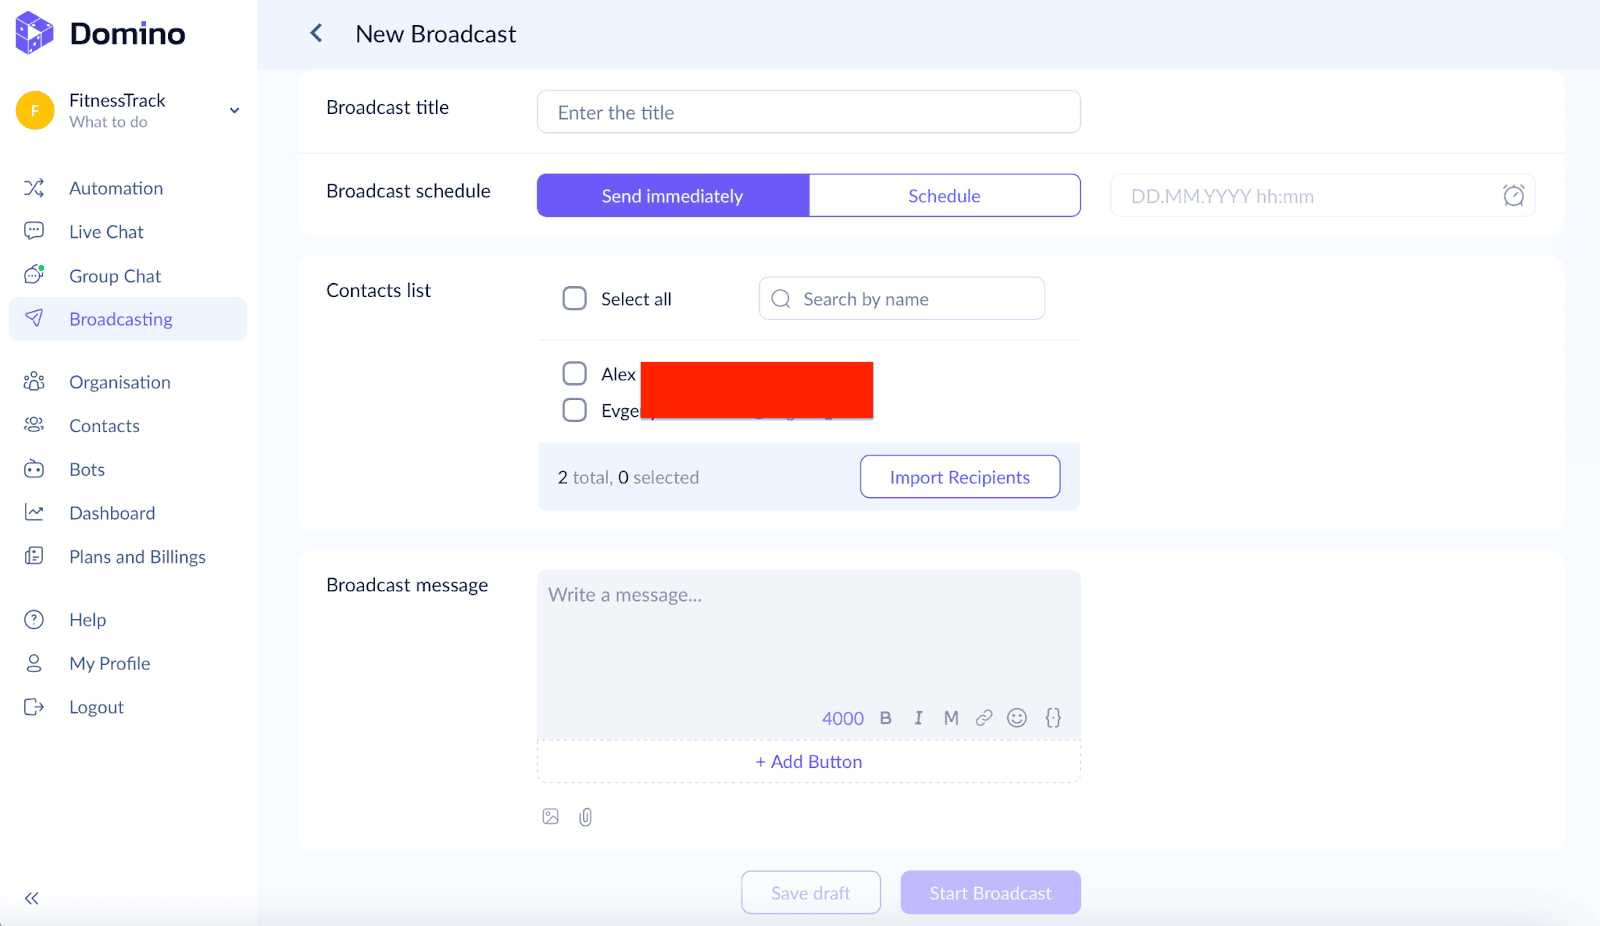
In the “Broadcasting” section, you can send messages to all your contacts or a selected group:
- Enter a title;
- Set the send time if you’re planning a future broadcast;
- Specify whether you want to send the message to all contacts or manually select specific recipients;
- The send list automatically includes those who have interacted with your bot;
- You can also upload external contacts in CSV format (Telegram rules allow sending messages only to consenting audiences, so be cautious with contacts who haven’t interacted with you);
- Compose your message;
- Add a button with a link or trigger;
- Save the draft or send the broadcast.
Miscellaneous
There are two basic paid plans with extended functionality: Starter and Pro.
- includes 5 Telegram chatbots, 5,000 conversations, and the ability to connect 5 human operators;
- includes 15 Telegram chatbots, 15,000 conversations, and the ability to connect 15 human operators.
We have prepared video tutorials on the main features of the Domino CRM chatbot constructor to help you quickly launch your chatbot and start actively engaging with clients!
Ask a question and we will get back to you as soon as possible

Your message has been sent!
We'll get back to you as soon as possible
